{{ t.homeTitle }}
{{ t.emptyList }}
{{ t.calendarTitle }}
{{ t.createTitle }}
{{ t.bookedTitle }}
{{ t.emptyList }}
{{ bookedItemData.title }}
-
{{ user.first_name + ' ' + user.last_name }} @{{ user.username }}TelegramID:
{{ user.telegram_id }}Был(а)
{{ user.last_entry }}
Пользователи не найдены
-
{{ user.first_name + ' ' + user.last_name }} @{{ user.username }}
{{ t.howUseProjector }}
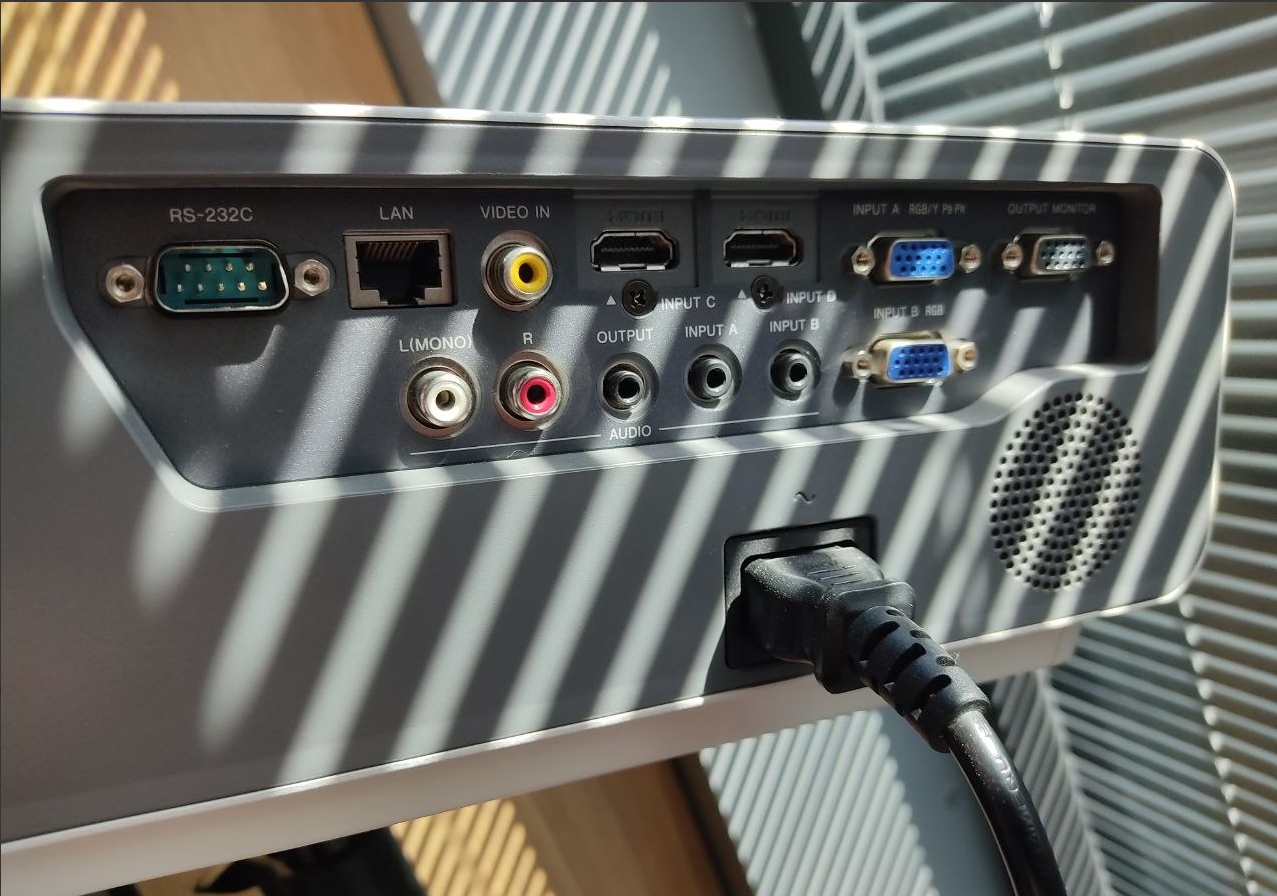
-
Подключите ноутбук
Подключите HDMI-кабель к ноутбуку и проектору.
Если в ноутбуке нет HDMI-разъёма, используйте переходник HDMI → Type-C.
Включите проектор кнопкой Power. -
Выберите источник
На пульте проектора нажмите Input и выберите HDMI.
-
Настройте изображение
Если изображение не появилось:
- проверьте, что на ноутбуке выбран вывод на внешний экран;
- попробуйте сочетание Win + P → Дублировать.
При необходимости настройте резкость и размер изображения с помощью колец регулировки на объективе проектора.
-
После просмотра
Выключите проектор кнопкой Power.
Если появится запрос на подтверждение выключения — подтвердите.
Не отключайте проектор от розетки сразу — дождитесь, пока он полностью завершит охлаждение.
После этого отсоедините HDMI-кабель и уберите его на место.
-
Connect the laptop
Connect the HDMI cable to the laptop and the projector.
If the laptop does not have an HDMI port, use the HDMI → Type-C adapter.
Turn on the projector using the Power button. -
Select the source
Press Input on the projector remote and select HDMI.
-
Adjust the image
If there is no image:
- make sure the laptop is set to output to an external display;
- try Win + P → Duplicate.
If necessary, adjust the image sharpness and size using the adjustment rings on the projector lens.
-
After use
Turn off the projector using the Power button.
If prompted to confirm, confirm the shutdown.
Do not unplug the projector immediately — wait until it has completely cooled down.
Then disconnect the HDMI cable and return it to its place.
-
Noutbukni ulang
HDMI kabelini noutbuk va proyektorga ulang.
Agar noutbukda HDMI porti bo‘lmasa, HDMI → Type-C adapteridan foydalaning.
Proyektorni Power tugmasi orqali yoqing. -
Manbani tanlang
Proyektor pultidagi Input tugmasini bosing va HDMI ni tanlang.
-
Tasvirni sozlang
Agar tasvir chiqmasa:
- noutbukda tashqi ekranga tasvir uzatish tanlanganini tekshiring;
- Win + P → Dublikat (Duplicate) tugmalarini tanlab ko‘ring.
Agar kerak bo‘lsa, tasvirning tiniqligi va o‘lchamini proyektor obyektividagi sozlash halqalari yordamida sozlang.
-
Foydalanishni tugatgandan so‘ng
Proyektorni Power tugmasi orqali o‘chiring.
Tasdiqlash so‘ralsa, o‘chirishni tasdiqlang.
Proyektorni darhol elektr tarmog‘idan uzmang — to‘liq sovishini kuting.
Shundan so‘ng HDMI kabelini uzing va joyiga qo‘ying.

-
Пользователи
-
{{ t.howUseProjector }}
-
 BI Service Manager Nafisa Khamidova
{{ t.directory }}
Администрация
{{ booking.title }}